Saturday, September 2, 2023

Transmission Installation

I tried to come up with a clever name for this post... but I'm too tired.

Over the past few days, I and my friends have been busier than a long-tailed cat in a room full of rocking chairs.  We swapped Alice's transmission... twice.  I'll explain later.

First, let me give a big THANK YOU to my friends Dave Boyer, Brett Engel, George Bean and Peter Holbrook for helping me get this done.  I would still be wrestling with the transmission crossmember in a horribly hot and cramped garage if it weren't for you all.  Thank you! 

Notice that there's more than a few days here... but we worked mostly in the later afternoons into the evenings, aside from the weekends.

Let's jump right in, shall we?

TUESDAY

I dropped the transmission and various bits off at Dave's beautiful air conditioned luxury apartment... I mean garage.  This was no big thing.


WEDNESDAY

Wednesday afternoon I drove Alice to Dave's and got to work.  Folks, this is how you work on a car.


We drained fluids, removed the radiator and hoses, removed the driveshaft, exhaust header and disconnected smaller things that were relatively easy to reach.  We got a good amount of that done.

Here's what I was working on.  Not bad, but very grimy in the middle part.


Dave was kind enough to feed me and take me home. ๐Ÿ˜

THURSDAY

On Thursday, we were able to remove the remaining connections and bits, dropped the transmission crossmember, and removed the engine and transmission.  This went relatively smoothly.  We took the engine and transmission out as one unit.  I had access to a hoist and I brought a load leveler, which made this much simpler.

The engine bay didn't look too bad...

We then separated the engine and transmission.  There it sits, forlornly, knowing it would not turn another mile.

I had planned to change the clutch (because that's what you do), but I was pleasantly surprised to find that the clutch is practically new.  I had documentation stating it had been changed before the car was parked/neglected, and I'm glad.  It saved me a lot of hassle.  Another good sign was that the release bearing was practically new and showed minimal wear.  It was so good that I will keep it as a spare.  This also matches my documentation.


I also found that the rear main seal was not leaking and the rear engine plate was dry.  That was another relief - I didn't want to have to dismantle it unless it was really necessary.  Whoever worked on the engine of this car did a good job.

That was enough for the evening. 

FRIDAY

The battle I was planning to enjoin was to change the timing gears, chain and tensioner.  The 18V engine went to a single-row chain and retarded the timing by 4 degrees.  This was probably a parts-bin decision, but it also had the effect of moving the powerband down a bit and may have helped with emissions along with the single-carb Zenith.  I wanted to revert to the original setup because I wanted the powerband a little higher for highway driving with the overdrive.

I had a duplex (two-row) setup that I coincidentally got from Dave.  (That man is a giver.)  As another fortuitous sign, the engine stopped exactly on TDC.  Removing the crank pulley and timing cover was straightforward.  I Then removed the tensioner (finding it was a Rolon aka kiss-of-death unit) and the assembly came free.  I was careful not to disturb the camshaft.

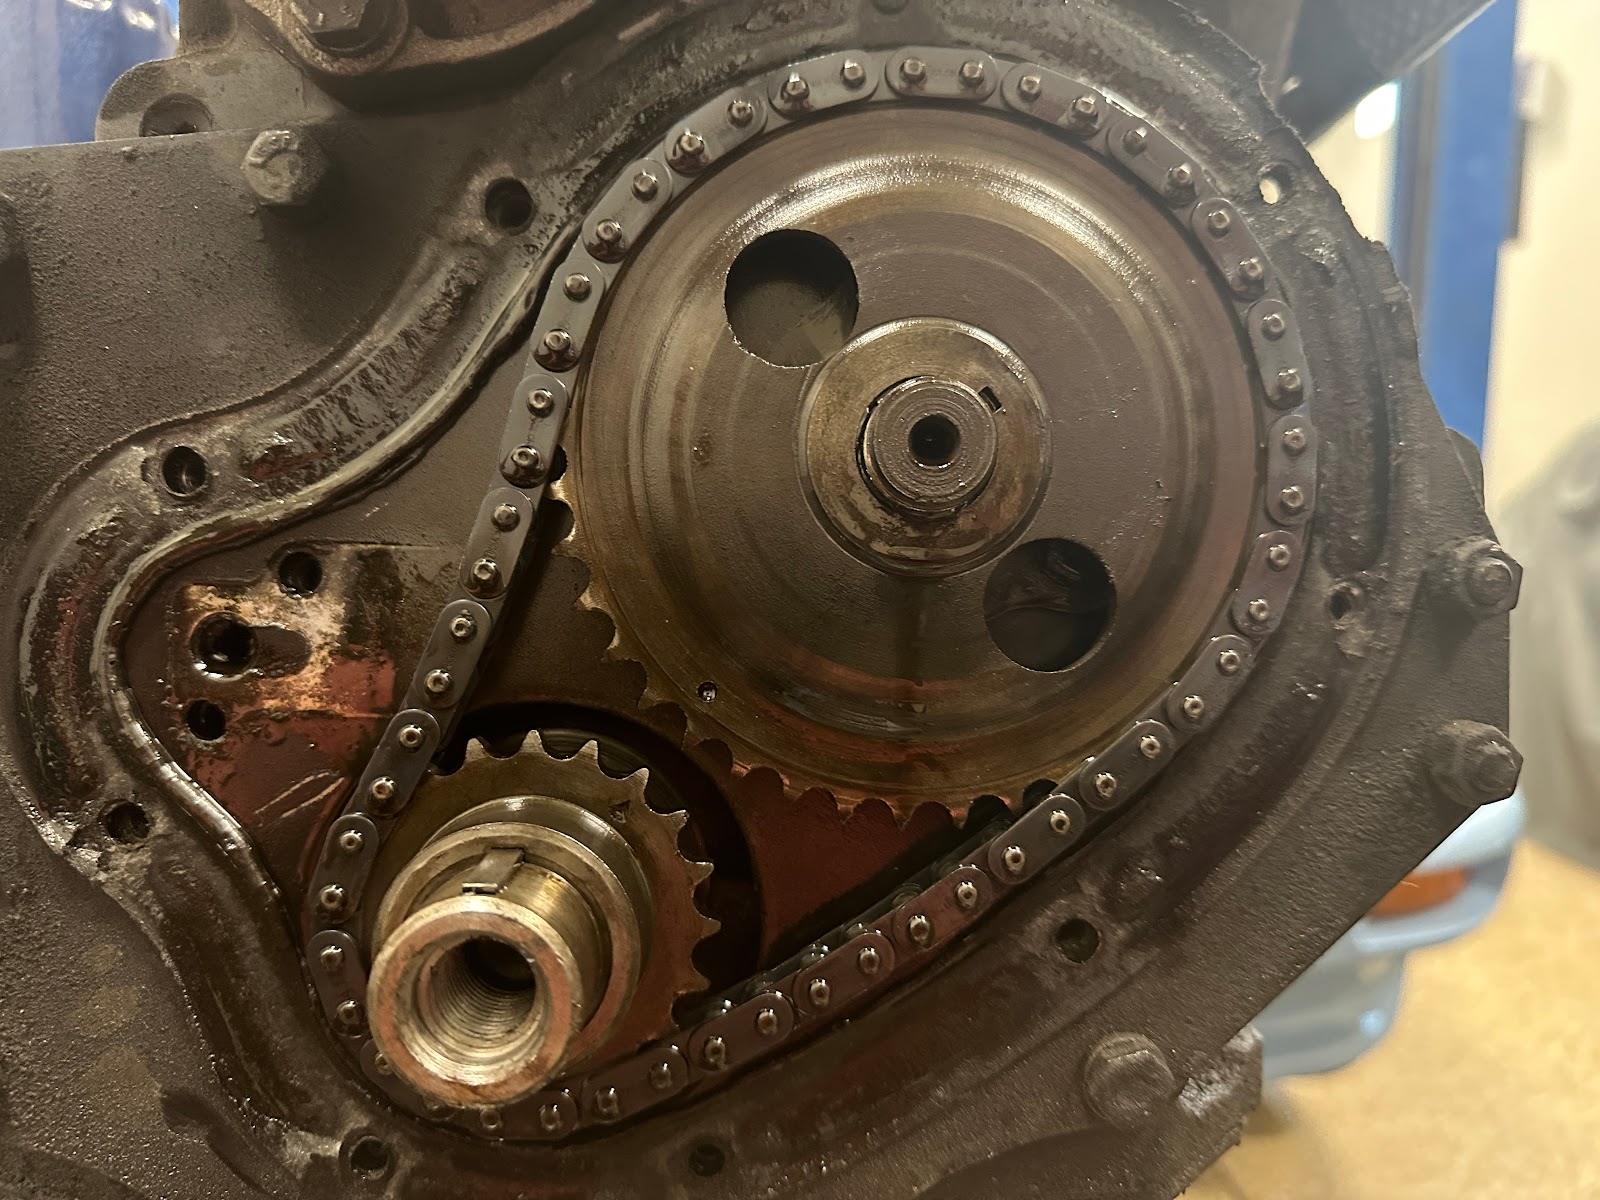
The new timing gear went in relatively easily, and we were careful to ensure the dots lined up.  However, this gear had the dot in a different orientation and a small mark where it looked like it "should be".  So we went with it.  This might not have been the right call.

Once complete, the new transmission went where the old one was.  Since we didn't disturb the clutch, it fit right away and bolted up fine.

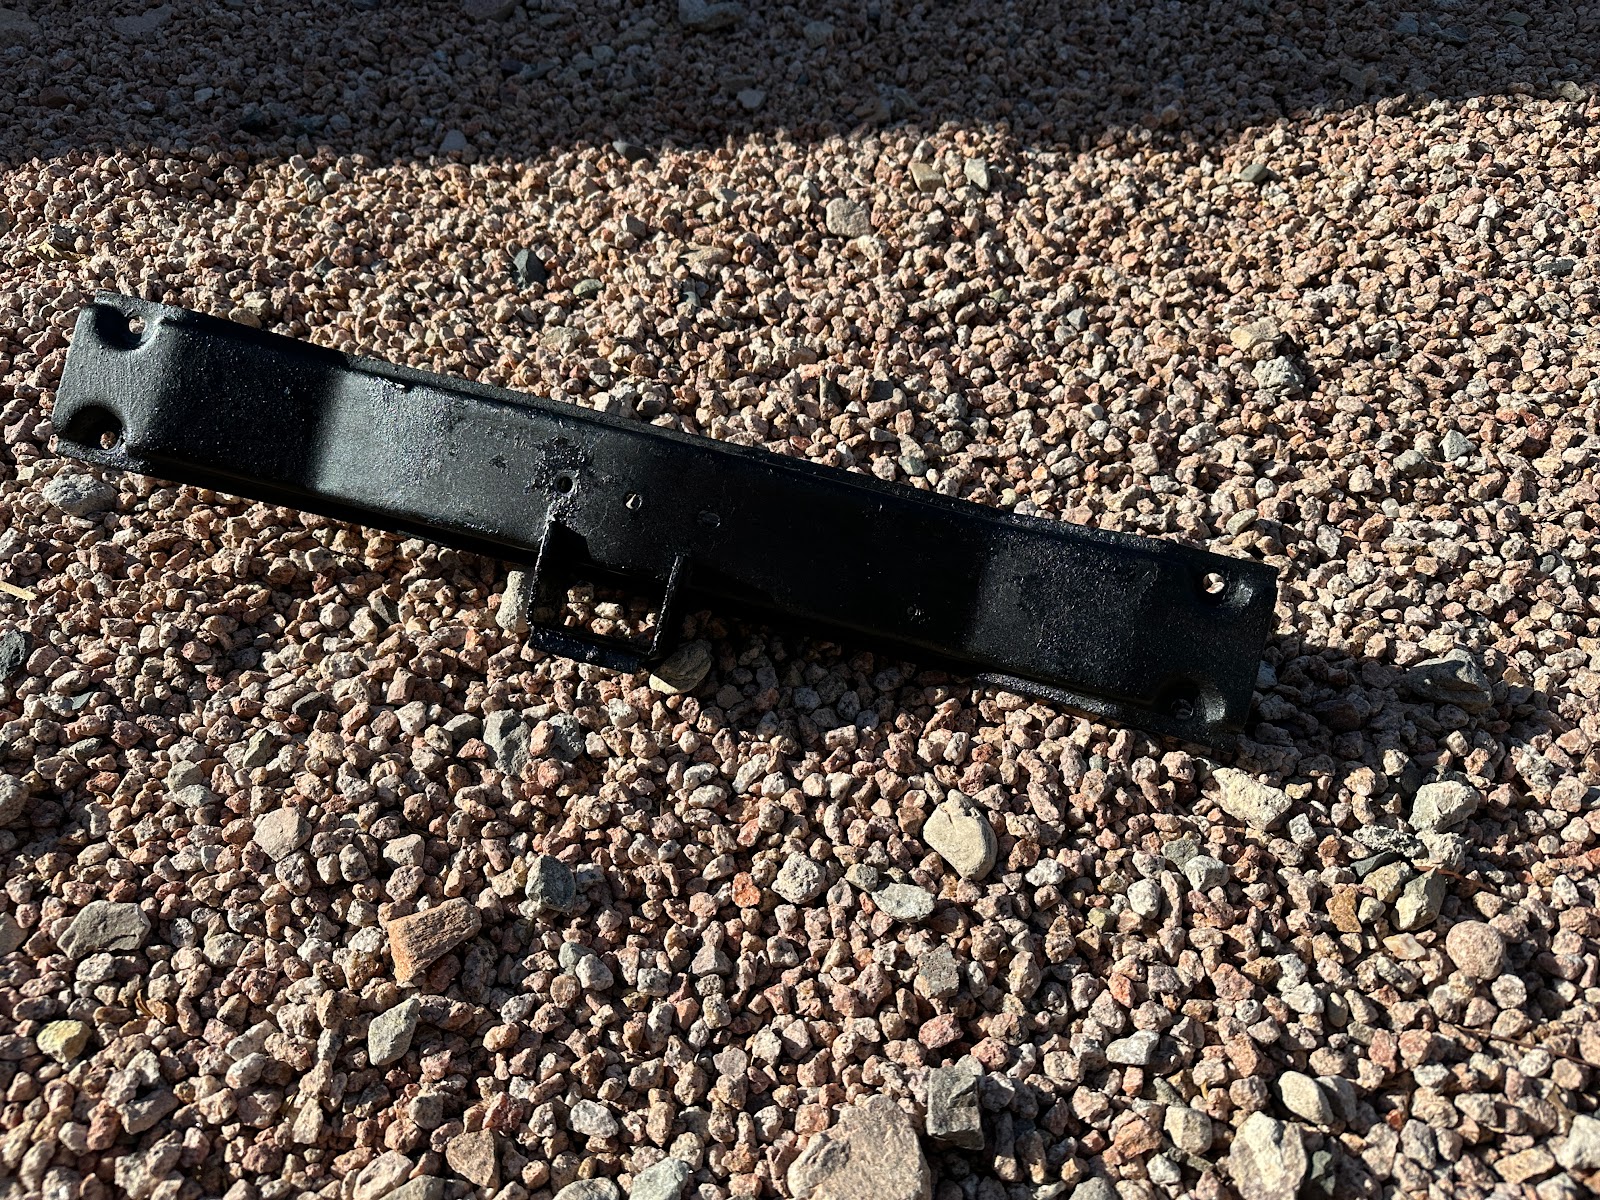
The next big job was to clean the transmission mount.  What came off was basically Jell-O.  The mounts were horribly degraded and the crossmember was filthy.  The rear of the transmission had been leaking, apparently for a long time, and had not been changed when the engine was rebuilt.  I can't imagine why, unless they pulled the engine without removing the transmission...

I won't show you any pictures because I was too filthy to touch anything I cared about.  But the result cleaned up well.  It goes without saying that I bought all new mounts.

I also took the opportunity to change the heater matrix (core).  The one I had was weeping enough to smell coolant, so I knew it was only a matter of time.  Fortunately, I had tons of room since I could stand in the engine bay and work on it at chest level, which made it lots easier.

The thing about the heater box is that it is very difficult to fit and remove, and you have to remove it to change the heater matrix.  Since I had just fitted it a year ago, I knew it would come out - and I had made a couple of modifications to the rubber seal to make the job easier.  I was able to unbolt the brake and fuel lines from the firewall, remove the screws and lever the heater box out enough to have it sit atop the shelf.  From there, I just unclipped the clips holding the box together and took the front panel off, followed by the matrix.  I could see where it was weeping.

Fitting the new matrix was simple and clipping the front cover in place was easy.  Wrestling the heater box back in place was still a chore, but shaving down the rubber seal and using expandable foam tape to fill the small gap made the job possible.  I refit the screws and lines back onto the firewall, and the job was done.  All in all, it took me a half hour.  Not bad.  And the vent control still worked.  

That was all the time and energy we had, so we stopped for the evening.

SATURDAY

Saturday was The Big Day.  The engine and transmission went back into the car.  I changed the passenger's side motor mount - I could not remove the driver's side mount because of brilliant British engineering that passes the steering shaft right through the support for that mount, and makes it impossible to remove the nut without removing the entire steering rack and column.  I wasn't up for that and it didn't look horrible, so it stayed.  It was really loose, though, and I managed to tighten it by jamming a screwdriver against the nut and turning the mount.  (This gave me an idea, but we'll get back to that.)

We discovered the magic trick to installing the transmission crossmember with new mounts:

  1. Install the mount and "cage" loosely to the transmission, getting the rear (impossible to reach otherwise) bolts started, and let the assembly hang loosely.
  2. Offer up the crossmember and maneuver the mounts through the holes.  There are two holes - front and rear - and we needed the front holes for the overdrive's slightly different mounting location.  (By the way, there are 16 different ways you can fit this assembly.  We got it right the first time.)
  3. Start the nuts on the mounts, then loosely fit the front mount bolts.  It will be a bit difficult, but much easier than trying to fit them both before fitting the crossmember.
  4. Finish tightening the rear mount bolts, then the front mount bolts and the mount nuts.  I found that I could use a swivel socket and a loooong extension to get to the nuts, but needed to wrench the bolts.  At least they were accessible (enough) with things being loose.
  5. With a jack and long 2x4 (or a transmission jack, if you have it), lift up the crossmember enough to be able to start the two bolts that join the "cage" to the bottom of the crossmember.
  6. Raise the crossmember up a bit more to the point where you can see if the bolts for the crossmember will fit into the holes you want to use.  If you have led a clean life, they will.  If not, you'll have to drop the crossmember and mounts and flip the "cage" around.  It gets weird.  If they fit, bolt them up and remove the support.

After getting the crossmember in place, I had to fit the wiring for the reverse lights and overdrive.  There was just barely not enough room to do this without scraping the back of my hand very badly.  (I'll survive.)

We then fit the exhaust and driveshaft, radiator support and radiator, hoses and lines, linkage, clutch secondary cylinder, speedo cable, etc.  Everything was nice and clean.


Finally, we filled Alice with fluids, hooked up the battery, started her up, and drove home.

Except that's not what happened.

Well, we did all the things except the 'drove her home' part.  There were some problems.

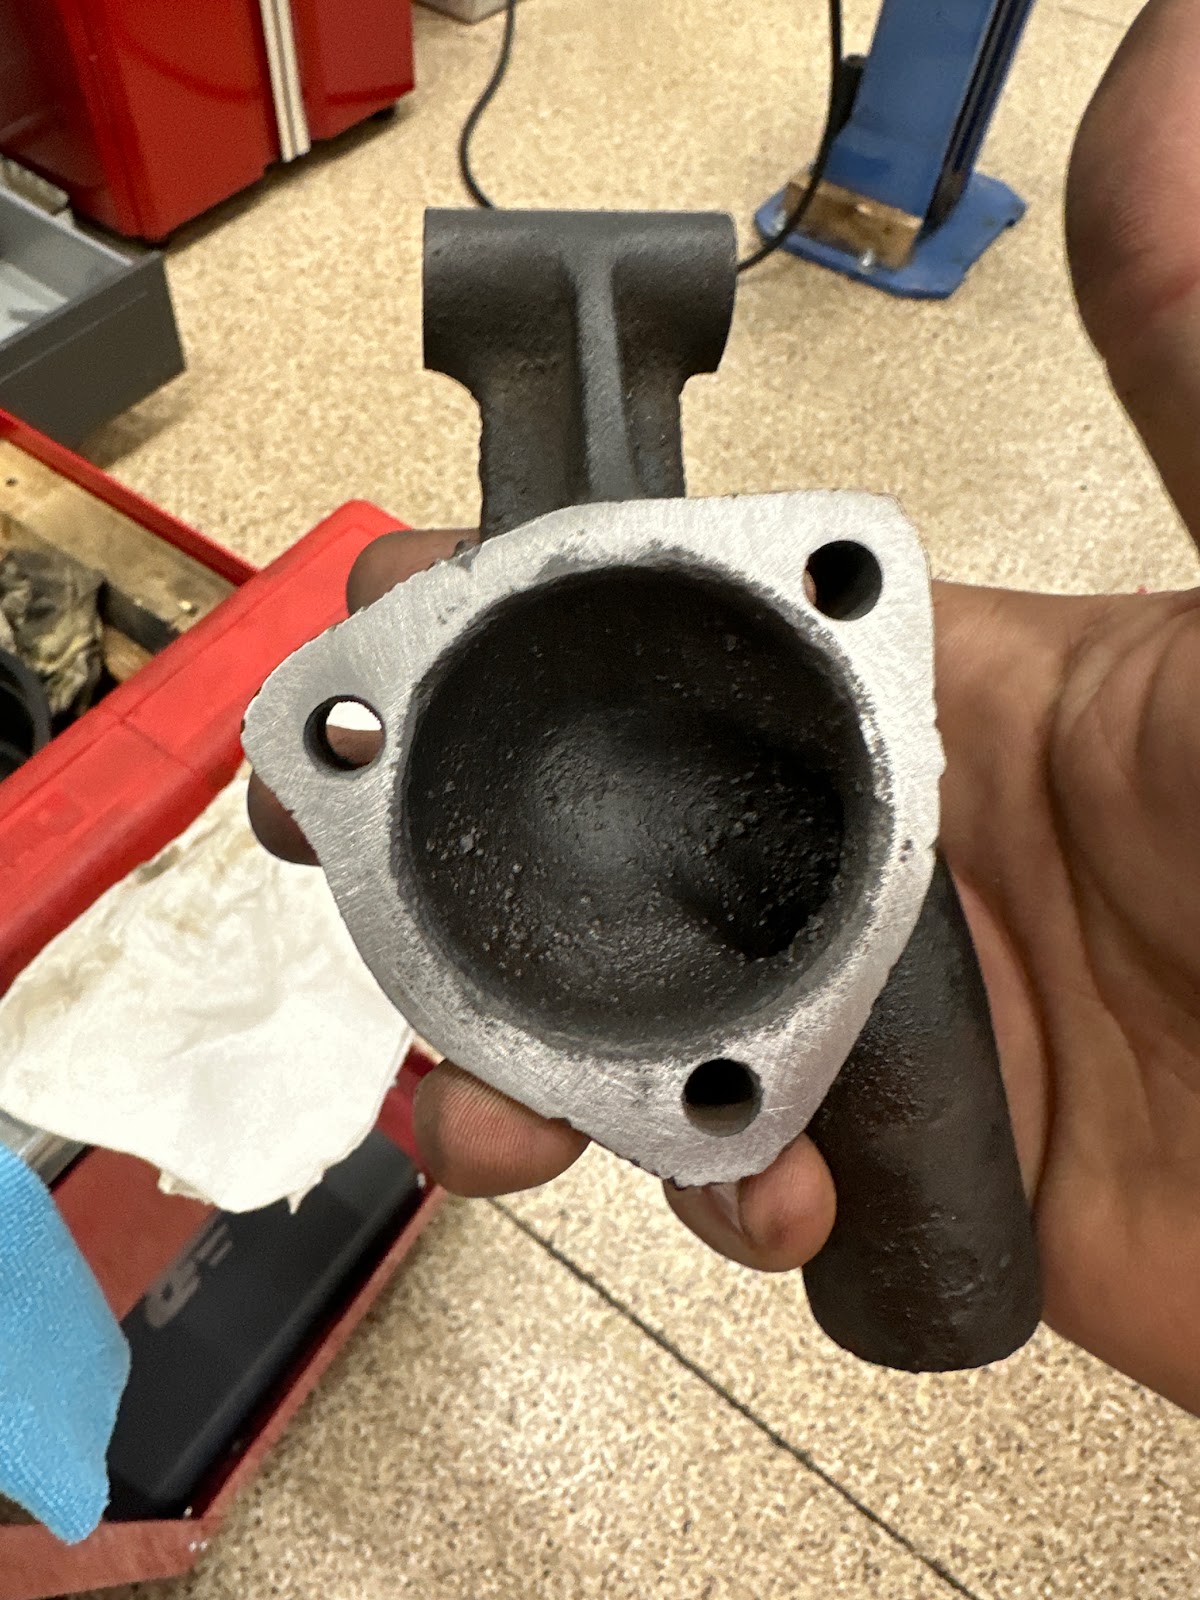
  1. The thermostat housing was leaking.  I changed the thermostat (embarrassingly enough, I didn't do that before) and I should have left well enough alone.  But that's an easy fix.
  2. She started right up fine, but then after about 30 seconds ran much more poorly.  We adjusted the distributor timing and it got better, but not great.  But it was good enough for a test drive.
  3. When I went on that test drive, I shifted into 1st (great!) and then 2nd (not so great).  Shifting into 2nd yielded a Very Bad Noise that sounded like rotating things striking each other.  But if I shifted gently, it didn't happen.  I did find that the overdrive worked (wahoo!).
So I got back to Dave's, and we decided that it was going to have to come out.  But then we went to lunch and called it a day, because we were definitely done.

SUNDAY

Sunday morning I went back to Dave's early and got busy.  I was now an expert at removing things from an MGB, so it actually went relatively quickly.  We got the engine and transmission out and separated, and took a look inside.  We did find that one of the plungers for the detents was a bit shorter, but that wasn't the root cause.

This was.


See that ground up part?

Dejected, I took the transmission home.  Later on that evening, I dismantled it on the bench and found the problem.


The retaining collar for the mainshaft was loose.  But why?  Well, I found out why.  When I assembled the mainshaft, I did not engage the ears on the 3rd gear thrust washer.  That left play in the assembly once the gear rotated (and did engage).  The resulting free play was enough to allow the 1/2 synchronizer assembly to move forward and contact the laygear just enough to grind the ever living snot out of it.

Fortunately, I had some things going for me.

  • I had the thing apart.
  • The laygear and rest of the innards looked okay.
  • I had a transmission for spare parts - the one I took out of the car.

So I took that other transmission apart.  It was... not pretty in there.

Someone really didn't love this thing.

However, it's just gunk.  The mainshaft was okay and the 1/2 synchronizer assembly I needed was just fine.  So I snitched it.

I also found out why the original transmission would grind when going into 4th gear...


See that crack?  The synchro ring couldn't grab the baulk cone properly, and so it would not slow the gear enough to engage properly.

Okay, back to what I was doing... when I put the mainshaft together, I made very sure that everything was engaged properly.  When I tightened the retaining collar, it went back to the position I should have expected by the marks on the locking tabs.


That was enough.  My ego couldn't take any more. 

WEDNESDAY

I recovered (in mind and body) enough by Wednesday to tackle reassembling the transmission.  I had new gaskets in hand and a clean workbench.

I reinstalled the mainshaft, input shaft and laygear as I have previously described in Transmission One and Done.  (Boy, that did not age well.)  The rest of the innards went in easily as did the adapter housing.  This time when I fit the front cover, I found I needed to remove the 2nd gasket I made and also add .006" of shims.  (In retrospect, the need for that second gasket should have been a clue.)  The overdrive dropped into place (I shared the trick in that post, too) and I buttoned everything up easy as pie.


This time, I felt it was going to be good.  The transmission shifted well on the bench without feeling any 'give' and was easy to get into gear.

THURSDAY

Thursday after work I went back to Dave's (I swear, I could find my way there blindfolded by now).  I had a short list of things I wanted to take care of before attempting to refit the transmission.

  1. I changed the timing gears and chain for an old fashioned non-adjustable set.  I just didn't trust the adjustable gear after how it initially ran well, then poorly.  It was a good thing I did - the gear looked like it had slipped.  I had tightened the gear down well, or so I thought.  It wasn't much, but it wasn't trustworthy.  With the new gear set, things looked right to me. The dots lined up at TDC.  (I marked TDC before I removed everything - it was easy enough.)


    I cleaned up the cover, fit the tensioner and oil thrower, put a wee bit of gasket sealant on the gasket and bolted it back together.
  2. I cleaned up the thermostat housing so it would seal properly.

  3. I cleaned Dave's garage.  We had made a mess, and I didn't like that.

I then decided I would try and refit the transmission back to the engine myself.  I got it together on the 4th try.  That sucker is heavy!

SATURDAY

Saturday was The Big Day Take Two.

The whole crew (minus Dave - he was not available, but we were still using his place, so it's all good) showed up midmorning and got to work.

First, I did the impossible - I changed that driver's side motor mount.  My secret?

I bought a cheapo 9.16" wrench and ground the open end down to about 1/8" thickness.  When we got to Dave's, I literally superglued the wrench to the nut on the back of the mount.  Once it set, I spun the old mount out and the new one in.  Once snug, I broke the wrench free from the nut.  It took 5 minutes.

Never tell me something is impossible.

For the rest, I'll spare you most of the gory details, except for a couple.  Remember how we got that crossmember to fit exactly the first time?  We were not so lucky this time.  It took a couple of tries to get it right.  but we did.  The new motor mount raised the driver's side of the engine up, which meant the passenger's side had to come up too - the whole assembly was cocked about 5ยบ.  But we got it sorted.

And we installed this.

That aluminum radiator has more coolant capacity AND A DRAIN PLUG.  I cannot fathom why British Leyland didn't fit a bung for a drain plug.

Anyhow, this time the story has a happy ending.  We buttoned everything up, filled fluids, started her up, and she ran just fine.  I went for a test drive and she shifted beautifully and ran well.  So we fitted the bonnet, and I drove Alice home.

She's so pretty!

Once on the road, I engaged the overdrive and it was magic.  On the highway, I was turning 3200 RPM at just over 70MPH.  That is a great cruising speed and was very relaxed compared to the almost 4000 RPM it was turning before.  And the temperature never climbed much past 'N', where before it would be closer to 'H' at this speed and ambient temperature (90-ish).

Alice is home safe and sound and happy.  I have a couple of things to tweak to get her purring perfectly, but this job is done.  I need a rest - but I still have Gidget's engine to put back together, so I guess I'll be working tomorrow...


Read more »

Friday, July 14, 2023

It's a Nice Day To... START AGAAAAAAAIN!

 One of the joys of vintage car ownership is the attention you get when you're driving around, especially if you have a unique looking vehicle like Alice.  Of course, you have to be able to start the car in order to drive it.  That's the topic of this article.

It's been hot in Arizona this summer.  (I know.  Go figure.)  Temps over 100 degrees are not kind to cars, especially those with 48-year old starters.  How do I know this? Because I foolishly decided to go for a drive with Alice when it was 105 degrees.  I figured it was just to the store, and maybe a stop or two... but it seems I cooked the starter just by being out in the heat.  I went to start her up and heard some odd, slow whiny noises, and no start was evident.  A good Samaritan helped me push-start her and I got home.  But from then on, all I'd get were slow, whining, whirry noises and maybe get her to start.

You know what that means - it's time for a new starter!

Replacing the starter in an MGB is not the ordeal you'd think it to be.  The starter is readily accessible from above and below the engine.  The simplest way to remove the starter is to remove the distributor.  

Before you start, DISCONNECT THE BATTERY.  You are playing with dangerous amounts of current when you unhook the starter leads.

Mark the orientation of the distributor, loosen the clamp with a 7/16" wrench, and pull it out (after unhooking all the wires).


Once removed, remove the leads from the starter solenoid from underneath the car, remove the two 9/16" bolts, and pull the starter free.  It is literally a 5 minute job!


The old starter is a pretty heavy lump.  Newer replacement starters are available at a pretty good price.  I bought a Premier Gear starter on Amazon for $82.  It came recommended by other MG owners.


Look how much smaller the new starter is!

I did find one little hiccup.  There is a flange on the new starter that makes it impossible to get a 9/16" socket on the lower bolt.  I ground this flange down a bit after a test fit.


From there, it was as simple as bolting the starter into place, hooking up the leads, and reinstalling the distributor with the alignment mark I made lined up.  I did have to remove the distributor cap to get the shaft to seat into the drive gear, but that's not a big deal.


The new starter is quite a bit lighter and it was easy to hold it in place from above while starting the top bolt.  It fits perfectly.  All in all, this took me maybe a half hour.

I reconnected the battery and turned the key.  I got a smooth, fast crank and then Alice fired to life.  The old starter cranked much more slowly, so it was either already weak or the new starter is more powerful.  (Probably a bit of both.)  I didn't even have to check the timing since I knew it was right, thanks to that alignment mark I made.

That's it!  Replacing the starter is a pretty straightforward job and extremely satisfying.  With luck, it will go another 48 years.

Read more »

Tuesday, June 27, 2023

Transmission One And Done

I've been working on acquiring an overdrive for Alice since I got her.  The overdrive is a highly sought after factory option, as it reduces RPM at speed and makes for a much more comfortable (and economical) driving experience.  I couldn't find an overdrive transmission, but I did find someone that would sell me the parts to convert my 4-speed to an overdrive.  I bought those last year and they were in a box until I finally managed to find time to get to work.  And with Alice's own 4 speed about to give up the ghost, it was time.

What's funny is that I ended up actually building two overdrives; I built one, and rebuilt another.  There was some mix-and-matching to get them done, but they both came together and I expect they'll work great.  So some of the pictures in this article don't exactly look like the same transmission, because they're not.  But the internals are the same.

DISASSEMBLY

Disassembly of the MGB 4-speed transmission is actually pretty simple and only requires a few tools.  The big parts are easy - remove the speedometer drive, the remote housing, the output flange, remove the rear extension.  These come off with only a few bolts.  Inside the rear extension is an assembly that keeps the linkage that engages the selector rods in place.  This can be a bit fiddly to remove, but have patience.  Once this assembly is out, the rear extension comes free.  The output flange has a very large nut, and an impact wrench (1 1/8" socket) is the simplest way to remove it.

Once these are off, you'll feel like you made a lot of progress.  Hold on to that feeling for a while.

The clutch fork and front cover are next.  Again, there's not much to it.  Remove the release bearing, then unbolt the clutch fork with a 9/16" wrench and remove it.  Remove years of grime and crud and then remove the front cover by undoing the 8 1/2" nuts that hold it in place and pulling it off the input shaft.

Now, it starts to get interesting...

Remove the side cover and gaze at the wonder that is a transmission's guts.  Then stop gazing and get back to work.

Remove the three 9/16" retaining bolts that hold the detent pistons and their springs in place, then remove the springs and pistons with a small magnet on a stick.  It you're lucky, they'll come right out.  I was not so lucky the first time, but they eventually came out.

Remove the selector rods by undoing the 7/16 retaining nuts and the 9mm (I'm sure it's Whitworth, but 9mm works) bolts, and withdraw the rods one at a time.  Once the rods are out, remove the selector forks, which are what move the synchro assemblies back and forth on the mainshaft as you move the selector rods back and forth.

The rest of the innards come out in a specific order:

First, remove the reverse gear by undoing its retaining bolt, withdrawing the shaft and then removing the gear from the housing.

Second, remove the shaft that holds the laygear in place.  The laygear is what transmits power from the input to the mainshaft.  Let the laygear drop down into the case - it needs to move out of the way for the next two parts.

Third, remove the input shaft (the part that connects to the engine).  This comes out with a little fiddling and as one assembly.

Fourth, remove the mainshaft.  This can be tough.  On one transmission, it took a half hour of careful tapping from the inside with a long punch against the main bearing's outer race.  This is one big bearing.  On the other, it almost fell out with only minor persuasion from a rubber mallet.  I was careful to not let the 3/4 synchro assembly fall off the shaft as I removed it.


Fifth, remove the laygear from the case.  This is fiddly as there are two thrust washers that keep things very closely aligned. 

Last, the mainshaft comes apart.  There is a retaining collar that screws into the front of the mainshaft, and it has a retainer that comes loose by tapping the spots where it's holding the collar out of the way.  Then the retaining collar can be unscrewed with some persuasion.  There's a special tool for this, but I used a Channel-lock pliers and put the mainshaft in a vise with padding to keep from damaging it.  After that, it's removing the gears one at a time, keeping them in order and proper orientation.

Folks, that's it for the big pieces.  You're left with an empty case.

RECONDITIONING

Reconditioning is mostly a game of cleaning, but there are some parts that need to be checked and probably replaced.  First and foremost, the synchro "baulk rings".  They're called that because they help slow, or "baulk", the gears being disengaged and engaged by gripping a cone.  The slowing of the shaft allows the synchro assembly to line up two gears, disengage one and engage the other.  Because the assemblies are at rest relative to each other, the gears mesh without "crashing".  Once engaged, the input shaft turns the laygear to connect input to output, and the different input/output ratios make the output shaft turn at a different speed relative to the input shaft.  (That's basically the whole magic of a transmission.)

The baulk rings are designed to wear and usually last 60-70 thousand miles, more if you're a smooth and easy driver.  They have little tiny teeth that wear out, and when they're worn out they don't do their job well enough to slow things down.  That's why a worn transmission is hard to "put into gear" and makes grindy noises when you try.  The photo below shows a new baulk ring with an older one.  See the way the teeth are worn?

Aside from the baulk rings, the bearings that support the laygear and between the input and output shafts can wear, but it's not too likely.  I replaced them because they aren't expensive, and I don't place on going back in there anytime soon.

The laygear shaft and thrust washers are known to wear, so inspect them.  For the thrust washers, this is where you check the 'end float' (the amount of space between the washer and the housing) when the laygear is installed.  If out of tolerance, replace them.

A full gasket set is required, of course.  The front cover seal should be replaced even if it feels supple.  The rear seal would also be replaced, but since I am converting to an overdrive I won't be using this part again.

Be sure to inspect each gear to ensure they're usable.  Chipped teeth, while unlikely, make the entire endeavor a waste of time.  You need these gears for the new mainshaft you're going to build.

CONVERSION

There are a few parts that change when you convert to an overdrive.  The mainshaft is different at the back because it fits into the overdrive unit.  The remote housing becomes an adapter to hold the overdrive unit.  The speedo drive is part of the overdrive unit.

The main part of the conversion is the swapping of gears from the non-OD mainshaft to the overdrive mainshaft.  Having removed them and kept them in sequence, this is pretty simple.  Just put things on the new mainshaft in the same order they came off, and lube everything a little bit as you do so.  Once the gears are in place, refit the retaining collar and its retainer.  Again, no special tool meant a Channel-lock was carefully employed.  Tap the retainer back into place to keep the retaining collar from turning.

REASSEMBLY

The Haynes manual loves to state that "installation is the reverse of removal."  This is a bit cheeky, but basically true.  The parts go back in in the order they came out.

First, the laygear and its thrust washers.  This rests in the bottom of the case like before so you can get the mainshaft and first motion shaft into place.  You will have fitted the new bearings before you put the laygear into position.

Second, the mainshaft.  This is a bit delicate as you don't want to damage the rather large gears that barely fit into the housing.  There is a key like a half moon which lines up with a matching pin, and that sets the orientation of the bearing outer race.  Once aligned, the outer race can be gently tapped with a rubber mallet around its edge.  The bearing will fit slowly at first, then start moving more freely until finally at the end it pops into place flush with the back of the housing.

Third, the input shaft.  Don't forget the caged needle bearing that goes between the input shaft and the mainshaft.  The input shaft should fit into place with little effort.

Fourth, install the layshaft.  This is a bit fiddly, and I tip the case so the layshaft will fall into place under the influence of gravity.  I use a long extension to help fiddle the laygear and thrust washers around until the layshaft slips into place.  Once installed the layshaft has a specific orientation that the front cover will maintain as it has a slot for the protrusion on the end of the layshaft.

Fifth, install the reverse gear and its retaining bolt.


Once all those parts are in place, it's a good idea to see if things turn freely.  The gears are in 'neutral', so you should be able to turn the input and output shafts separately and without significant effort.

With the guts of the transmission back in place, refit the selector forks and rods and the detent pistons and springs.  The selector forks and rods have a specific orientation and only go together one way, so you can't really mess it up.  But I take lots of pictures both for articles like these and to help my poor short term memory.


Once again, stop and admire your work for a moment.  You earned it.

Finally, refit the front cover.  This requires a little bit of math.  (I never said there would be no math.)  You measure the depth of the front cover where the input shaft bearing fits, add a little bit for the cover gasket, and subtract the height of the input shaft bearing where it protrudes from the case. This tells you how thick any shims between the cover and the bearing have to be.  This is really hard unless you have a good micrometer, but I only have an okay micrometer.  I managed.

It is usually okay to just refit the cover with the shims that were there before (replacing them if they're damaged, which happens often).  However, note that you really should measure this.  If there is a gap, the input shaft bearing can move back and forth and cause premature failure of the bearing.  One trick is to get some modeling clay and make a reverse cast of the inside of the cover, which is easier to measure.

Fit the cover and any shims, and tighten the cover down slowly and evenly.  Once fully in place, make sure the input shaft spins freely with the selector rods in neutral.  If it doesn't, then you have too much shimming.

On one of the two transmissions, I actually needed to make a double gasket to create a little more gap to allow things to spin freely.  This transmission had something similar done before.  On the other, the shims were needed.

INSTALLING THE OVERDRIVE

Now that the main portion of the transmission has been reassembled, the fun part can begin.  The overdrive unit was after all the whole point of the exercise.

The LH type overdrive is an interesting piece of kit.  When not engaged, it transmits power by a 1:1 ratio between the input and output shafts.  (Gear ratios are measured by input:output, so X turns of the input shaft equates to Y turns of the output shaft.)  The action of a solenoid engages a little hydraulic pump that builds pressure.  This pressure forces springs forward to engage a cone clutch, which sends the input power through a planet-and-sun gear set and changes the input/output ratio to something less than 1:1 (like 0.82:1).  The output shaft spins more slowly as a result.  This 'over-unity' ratio is the 'over' part of 'overdrive'.  It's pretty simple and bulletproof if not abused.

The first part of installing the overdrive is installing the remote adapter housing.  This housing is shorter to make up for the overdrive unit's length.  (In fact, the non-OD and overdrive units are the same length, and for the later overdrive units are a direct swap.)  The remote adapter housing has the linkage to control the selector rods.  Fit a new gasket and bolt the housing into place with the linkage engaged to the selector rods (but still in neutral).

I ran into an interesting problem when I first assembled one transmission.  The mainshaft and laygear didn't line up quite right.  I spent quite a bit of time fussing about this, and finally called my new friend Dick Moritz, He the Keeper of Overdrive Secrets.  He informed me that sometimes, the large double-bearing on the mainshaft gets distorted a bit when the pressure on it relaxes during disassembly.  His answer was to bolt the remote housing down evenly and watch the gears move into place.  And golly, he was right.  The other transmission didn't have this little issue and I fitted the remote housing without incident.

See the before and after I'm talking about...

The next part is one that you cannot forget, or nothing will happen when you engage the overdrive.  The overdrive's mainshaft has a small eccentric cam held in place with a 3/16" ball bearing.  This is what drives the pump inside the overdrive unit.  Fit the cam and bearing, being very careful not to let that ball bearing fall into the case.  I pack cloths around the mainshaft to prevent that from happening.  Once fitted, remove the cloths.

Fitting the overdrive to the remote housing can be difficult, unless you know "the trick".  Fortunately for you, I am going to share the secret passed on to me by He the Keeper of Overdrive Secrets...

First, line up the teeth inside the overdrive by using a long screwdriver to force them in a counter-clockwise direction.

Second, turn the output shaft until the big part of the cam is facing the flat part of the case.

Now, put the transmission into a gear (any will do) and use a locking pliers on the input shaft to keep it from turning at all.  This is the part of "the trick" that makes it work.

Next, remove the filter cover and filter from the bottom of the overdrive unit and thread a small nylon rope through and around the pump drive.  You want to be able to pull the pump drive back about 1/4" so it won't run into the cam, which you thoughtfully oriented so the smallest part is where the pump will be.  Make sure you can pull back on the pump drive a few times before proceeding.  It shouldn't make that much effort.


It's time to offer up the overdrive unit.  Fit a new gasket between the remote housing the the overdrive, and slide the overdrive onto the output shaft.  It will go a little ways, then stop.  That's okay.

Here's the rest of "the trick".  Pull the nylon rope that pulls on the pump drive and turn the output flange counter-clockwise ever so slightly.  After maybe 1/8 of a revolution, the whole overdrive unit will drop into place with a 'thunk' and rest against the remote housing.  Remove the nylon rope and refit the filter and cover.  Bolt the overdrive into place with the 8 nuts and lock washers (four have a lower profile because it's really fiddly to get them into place).  Remove the locking pliers and take the transmission out of gear, and make sure the input and output turn freely and independently of each other.


Celebrate!

FINAL ASSEMBLY

The last bit of assembly is to fit the remote shifter unit with a new gasket.  The little retaining assembly for the linkage goes in first, and that can be tough to fit.  Line up the linkage in the selector rods and then you should be able to slide the retainer into place.  Have patience - it came out, so it will go back in.  Once in place, fit the gasket, line up the ball in the housing's linkage with the socket in the selector's linkage, and bolt the housing into place.  Don't forget about the little plastic cup that goes on the ball.

Fit the side cover with its own new gasket.  Refit the clutch fork and a new boot and release bearing, and you're done.


See, that wasn't so hard!

Rebuilding a gearbox is really all about diligence and patience.  There's nothing magical going on in there.  Fitting the overdrive is also seen as a black art, but now that you know "the trick" it's not a big deal.  I did all of this with a few wrenches, pliers and sockets, a couple of screwdrivers, a bench vise and an impact wrench and large socket (the one "special" tool I used and would have had to buy if I didn't have it).

Now that the transmission's done, it has to go into the car.  But that's another story...

Read more »